Ultimate Server Guide
The Proxmox / Docker Server Information
- Create ZFS "folders" aka dataset
- New Proxmox / Docker Server Deployment guide
- PROXMOX Nag Screen Removal
- PROXMOX VM Tips
- Setting up SAMBA
- VFIO "GPU Passthrough" Guide for Proxmox
- Updating Portainer
- Postgresql
- Checkpoints and Snapshots for ZFS
- Backups
- Directory Tree Scanner - qdirstat - windirstat alternative
- Docker Network Limit fix
- Add Pfetch and fastfetch to proxmox along with making it run at start
- Proxmox Power Savings / CPU Governor
- ZSH customize without OhMyZSH
Create ZFS "folders" aka dataset
Run this command to create a ZFS Dataset
zfs create rpool/config/<containername>
Run this command to destroy a ZFS Dataset
zfs destroy rpool/config/<containername>
New Proxmox / Docker Server Deployment guide
Deployment Summary
Here, we will document the general steps to deploy a Proxmox / Docker setup.
- Install Proxmox Development Environment.
- Fix the repositories. We need to remove the enterprise repos and add the no-subscription repos
nano /etc/apt/sources.list.d/pve-enterprise.listComment out the enterprise entry with # and save
/etc/apt/soruces.list.d/ceph.listComment out the entry here as well.
nano /etc/apt/sources.listCheck one of my running servers to see what it has, but my newer one has this
deb http://ftp.debian.org/debian bookworm main contrib
deb http://ftp.debian.org/debian bookworm-updates main contrib

# Proxmox VE pve-no-subscription repository provided by proxmox.com,
# NOT recommended for production use
deb http://download.proxmox.com/debian/pve bookworm pve-no-subscription

# security updates
deb http://security.debian.org/debian-security bookworm-security main contrib
deb http://download.proxmox.com/debian/pve bullseye pve-no-subscription- Update and Upgrade the server
apt update && apt upgradePossibly important, maybe not
This below command- I'm not sure it makes sense, so I wouldn't run it, but Allyn gave it to me so it may be necessary. I'm confused because it says apt-get install when we never use apt-get.
apt update && apt upgrade -y && reboot apt-get install -y apt-transport-https ca-certificates curl gnupg2 software-properties common- Uhh, adds some docker repo key? Fuck if I know.
curl -fsSL https://download.docker.com/linux/debian/gpg | apt-key add -- Add the Docker Repo, so we can install docker.
add-apt-repository "deb [arch=amd64] https://download.docker.com/linux/debian $(lsb_release -cs) stable"- If using ZFS, create mount points for rpool/docker. If you aren't, skip this step.
zfs create -o mountpoint=/var/lib/docker rpool/dockerzfs create -o mountpoint=/config rpool/configmkdir /etc/systemd/system/docker.service.dnano /etc/systemd/system/docker.service.d/storage-driver.conf[Service]
ExecStart=
ExecStart=/usr/bin/dockerd --storage-driver=zfs -H fd://- Install Docker via the following command
apt update && apt install docker-ce docker-ce-cli containerd.io -y- Check Stroage Driver - probably checking to see if ZFS is the Storage Driver. Only applicable if you user ZFS.
docker info | grep StorageInstalling Portainer
- Create a ZFS pool for Portainer. This enables ZFS features for the container.
zfs create rpool/config/portainer- Install Portainer by running this command
docker run -d -p 8000:8000 -p 9000:9000 -p 9443:9443 --name=portainer --restart=always -v /var/run/docker.sock:/var/run/docker.sock -v /config/portainer:/data portainer/portainer-ce:latestInstalling Portainer App Templates
- Install the following URL into the App Templates area in Portainer Settings.
https://raw.githubusercontent.com/ntv-one/portainer/main/template.json
https://raw.githubusercontent.com/portainer/templates/master/templates-2.0.json - this was mine idk
PROXMOX Nag Screen Removal
Run the following command in the proxmox terminal
sed -Ezi.bak "s/(Ext.Msg.show\(\{\s+title: gettext\('No valid sub)/void\(\{ \/\/\1/g" /usr/share/javascript/proxmox-widget-toolkit/proxmoxlib.js && systemctl restart pveproxy.servicePROXMOX VM Tips
Help! My VM won't shutdown!
- Stop the current shutdown task by clicking on the task in the Tasks List
- Press Stop
- Click the dropdown next to Shutdown in the top right and select "Stop"
Help! My VM randomly suspends!
- Edit Power Plan in Windows to never sleep hard disks and never sleep display
Help! My game crashes without warning!
- Esnure your VM has actual RAM size defined accordingly ([RAMSIZE] x 1024): (ex: 4096/8192) - RECOMMENDED 16GB (16384MB) minimum!
- Set processor type to "host" on Proxmox VM
Increase the hard drive space of a PROXMOX VM:
- Shut down the VM
- Run the command: (Example: qm resize 100 ide0 +150G)
-
qm resize [VM_ID] [DISK_NAME] +[SIZE_INCREASE]G - Start the VM
- Go into Disk Management, right-click the drive you want to add the additional storage to and press extend volume
- As a general rule. Windows only allows you to extend partitions that are next to each other. If you your new unallocated volume is NOT physically next to your main partition, you will have to use a third party tool to "move" it next to it. I recommend > https://www.diskpart.com/download-home.html < The free version of this software has a solid and tested feature to re-arrange partitions on a physical drive. After using this tool to move your partition structure, you should now be able to complete 5.
- Send it.
- In order to decrease the size of your VM volume, do these steps in reverse.
- Shrink the volume in windows
- Write down the amount of space you shrunk the volume by in G
-
qm resize [VM_ID] [DISK_NAME] -[SIZE_INCREASE]G
Setting up SAMBA
VFIO "GPU Passthrough" Guide for Proxmox
BIOS Settings:
- Disable Above 4G
- Disable ReBAR
- Disable SR-IOV (Leave this enabled if using a Quadro or other SR-IOV enabled graphics accelerator)
- Enable IOMMU Support
- Enable VT-d
- Ensure primary output in BIOS is set to iGPU (NOT AUTO)
Proxmox Kernel Version:
- Ensure Proxmox is running on kernel version 6.0.2 or later -
pveversion -v - Update Proxmox -
-
apt update
apt dist-upgrade
reboot
Proxmox Config:
nano /etc/kernel/cmdline
root=ZFS=rpool/ROOT/pve-1 boot=zfs
Change to:
For Intel:
root=ZFS=rpool/ROOT/pve-1 boot=zfs quiet intel_iommu=on
For AMD:
root=ZFS=rpool/ROOT/pve-1 boot=zfs quiet amd_iommu=on- Update the Proxmox Kernel Commandline to boot with IOMMU Support
- Enable IOMMU in Proxmox
-
nano /etc/default/grub Comment out #GRUB_CMDLINE_LINUX_DEFAULT="quiet" Replace with GRUB_CMDLINE_LINUX_DEFAULT="quiet intel_iommu=on" - For Intel GRUB_CMDLINE_LINUX_DEFAULT="quiet AMD_iommu=on" - For AMD Save update-grub - Add Kernel Modules
-
nano /etc/modules vfio vfio_iommu_type1 vfio_pci vfio_virqfd - Blacklist GPU drivers from loading on root Proxmox (may be needed)
-
nano /etc/modprobe.d/blacklist.conf blacklist nvidia blacklist nouveau blacklist radeon blacklist amd - Ensure your GPU is in a SEPARATE IOMMU GROUP
-
lspci -v - Find the group number with your GPU find /sys/kernel/iommu_groups/ -type l If you do notice that the GPU you’re using is in the same group as another device, run the command below to attempt to isolate the device then reboot Proxmox and run the steps above again to verify. echo "options vfio_iommu_type1 allow_unsafe_interrupts=1" > /etc/modprobe.d/iommu_unsafe_interrupts.conf - Reboot
Virtual Machine Configuration:
- Boot VM normally and setup Remote Desktop
- Shutdown VM
- Ensure BIOS Type is set to OVMF (UEFI)
- Ensure Memory does not have Ballooning Device enabled
- Add the GPU by selecting Add > PCI Device > Select your GPU (Ensure it is the proper IOMMU group as discovered with lspci -v)
- Ensure that All fuctions, ROM-bar, Primary GPU, and PCI-Express are all enabled.
- Change Display Type to NONE
- Log in via Remote Desktop
- Install Graphics Card Drivers
- Reboot.
- Enjoy.
Updating Portainer
From Proxmox:
docker stop portainer
docker remove portainer
docker pull portainer/portainer-ce:latest
docker run -d -p 8000:8000 -p 9000:9000 -p 9443:9443 --name=portainer --restart=always -v /var/run/docker.sock:/var/run/docker.sock -v /config/portainer:/data portainer/portainer-ce:latest
IF YOU ACCIDENTALLY UPGRADE TO EE (Business Edition):
docker stop portainer
docker run -it --name portainer-database-rollback -v /config/portainer:/data portainer/portainer-ee:latest --rollback-to-ce
docker run -d -p 8000:8000 -p 9000:9000 -p 9443:9443 --name=portainer --restart=always -v /var/run/docker.sock:/var/run/docker.sock -v /config/portainer:/data portainer/portainer-ce:latest
Postgresql
\l < list databases
create database:
CREATE DATABASE database;
delete database:
DROP DATABASE database;
grant admin to user on new db:
GRANT ALL PRIVILEGES ON DATABASE database TO user;
Checkpoints and Snapshots for ZFS
Zpool checkpoint rpool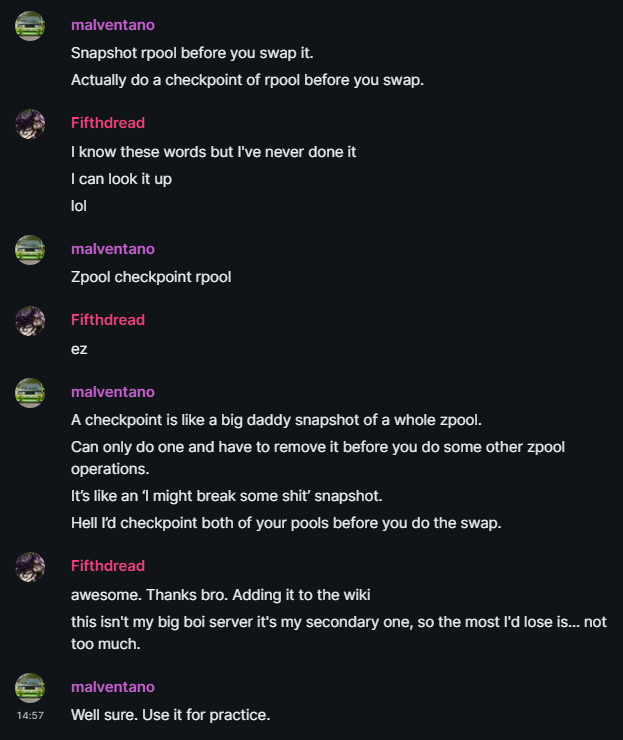
Backups
Backups are accomplished differently depending on the server.
Proxmox1 uses Duplicati
Proxmox2 uses rsync
Rsync & crontab
Using the below command, you can see the rsync commands which backup docker.
crontab -eBelow is an example configuration.
# Palworld Hourly Backup
0 * * * * rsync -aAX --delete --exclude '*.recycle' --exclude 'rsync' /config/palworld/Pal/Saved /config/rsync/backups/palworld/palworld_$(date +\%FT\%H\%M\%z)

# Daily Rolling Backup at 1am
00 01 * * * rsync -aAX --delete --exclude '*.recycle' --exclude 'rsync' /config/ /config/rsync/backups/daily/daily

# Weekly Backup at 2pm on Friday
00 02 * * 5 rsync -aAX --delete --exclude '*.recycle' --exclude 'rsync' /config/ /config/rsync/backups/weekly/weekly_$(date +\%FT\%H\%M\%z)

# Monthly Backup at 3am on 1st of the month
00 03 1 * * rsync -aAX --delete --exclude '*.recycle' --exclude 'rsync' /config/ /config/rsync/backups/monthly/monthly_$(date +\%FT\%H\%M\%z)
This website can help setup various timings for when to run rsync.
Note that cron jobs require a leading slash ahead of % symbols. Example: date +\%FT\%H\%M\%z
Note that an empty line is required below the crontab -e file
Directory Tree Scanner - qdirstat - windirstat alternative
Directory Tree Scanner - qdirstat - windirstat alternative
Docker Network Limit fix
nano edit the below file
/etc/docker/daemon.json
{
  "log-level": "warn",
  "log-driver": "json-file",
  "log-opts": {
    "max-size": "10m",
    "max-file": "5"
  },
  "default-address-pools": [
    {
      "base": "172.16.0.0/12",
      "size": 24
    }
  ],
  "runtimes": {
    "nvidia": {
      "path": "nvidia-container-runtime",
      "runtimeArgs": []
    }
  }
}
Save, restart docker
service docker restart
then maybe restart containers and stacks
Add Pfetch and fastfetch to proxmox along with making it run at start
apt install unzip && wget https://github.com/dylanaraps/pfetch/archive/master.zip && unzip master.zip && install pfetch-master/pfetch /usr/local/bin/ && ls -l /usr/local/bin/pfetch && echo -e "\n# Add pfetch command\npfetch" >> ~/.bashrc
cd ~/ && wget https://github.com/fastfetch-cli/fastfetch/releases/download/2.20.0/fastfetch-linux-amd64.tar.gz && tar -xf fastfetch-linux-amd64.tar.gz && mkdir /root/bin/ && cp ~/fastfetch-linux-amd64/usr/bin/* /bin/
get fastfetch on raspberry pi
https://lindevs.com/install-fastfetch-on-raspberry-pi
Proxmox Power Savings / CPU Governor
https://tteck.github.io/Proxmox/#proxmox-ve-cpu-scaling-governor
https://community.home-assistant.io/t/psa-how-to-configure-proxmox-for-lower-power-usage/323731/27
Proxmox ships with Performance Governor by default, and you may want to change it to save power.
bash -c "$(wget -qLO - https://github.com/tteck/Proxmox/raw/main/misc/scaling-governor.sh)"ZSH customize without OhMyZSH
git clone --depth=1 https://gitee.com/romkatv/powerlevel10k.git ~/powerlevel10k && echo 'source ~/powerlevel10k/powerlevel10k.zsh-theme' >>~/.zshrc