
Git Cheat Sheet / Guide
https://ittools.fifthdread.com/git-memo
Install Git on MacOS
brew install git
Install Git on Windows
https://git-scm.com/download/win
Set Config
git config --global user.name "[name]"
git config --global user.email "[email]"
example:
git config --global user.name "testuser"
git config --global user.email "email@emailtest.com"
Set Editor to nano on MacOS
git config --global core.editor "nano"export GIT_EDITOR=nanoexport VISUAL=nano
export EDITOR="$VISUAL"Generate SSH Key
On Windows
ssh-keygen.exe -t rsa -b 4096On MacOS / Linux
ssh-keygen -t rsa -b 4096Press Enter - No Passphrase, leave empty
Take public key and upload into Gitea
Key is located in /Users/<username>/.ssh
Take id_rsa.pub - Open in text editor. Copy contents.
Go to profile on Gitea HERE: https://gitea.fifthdread.com/user/settings/keys

Add Key
Paste public key information into Content Box.
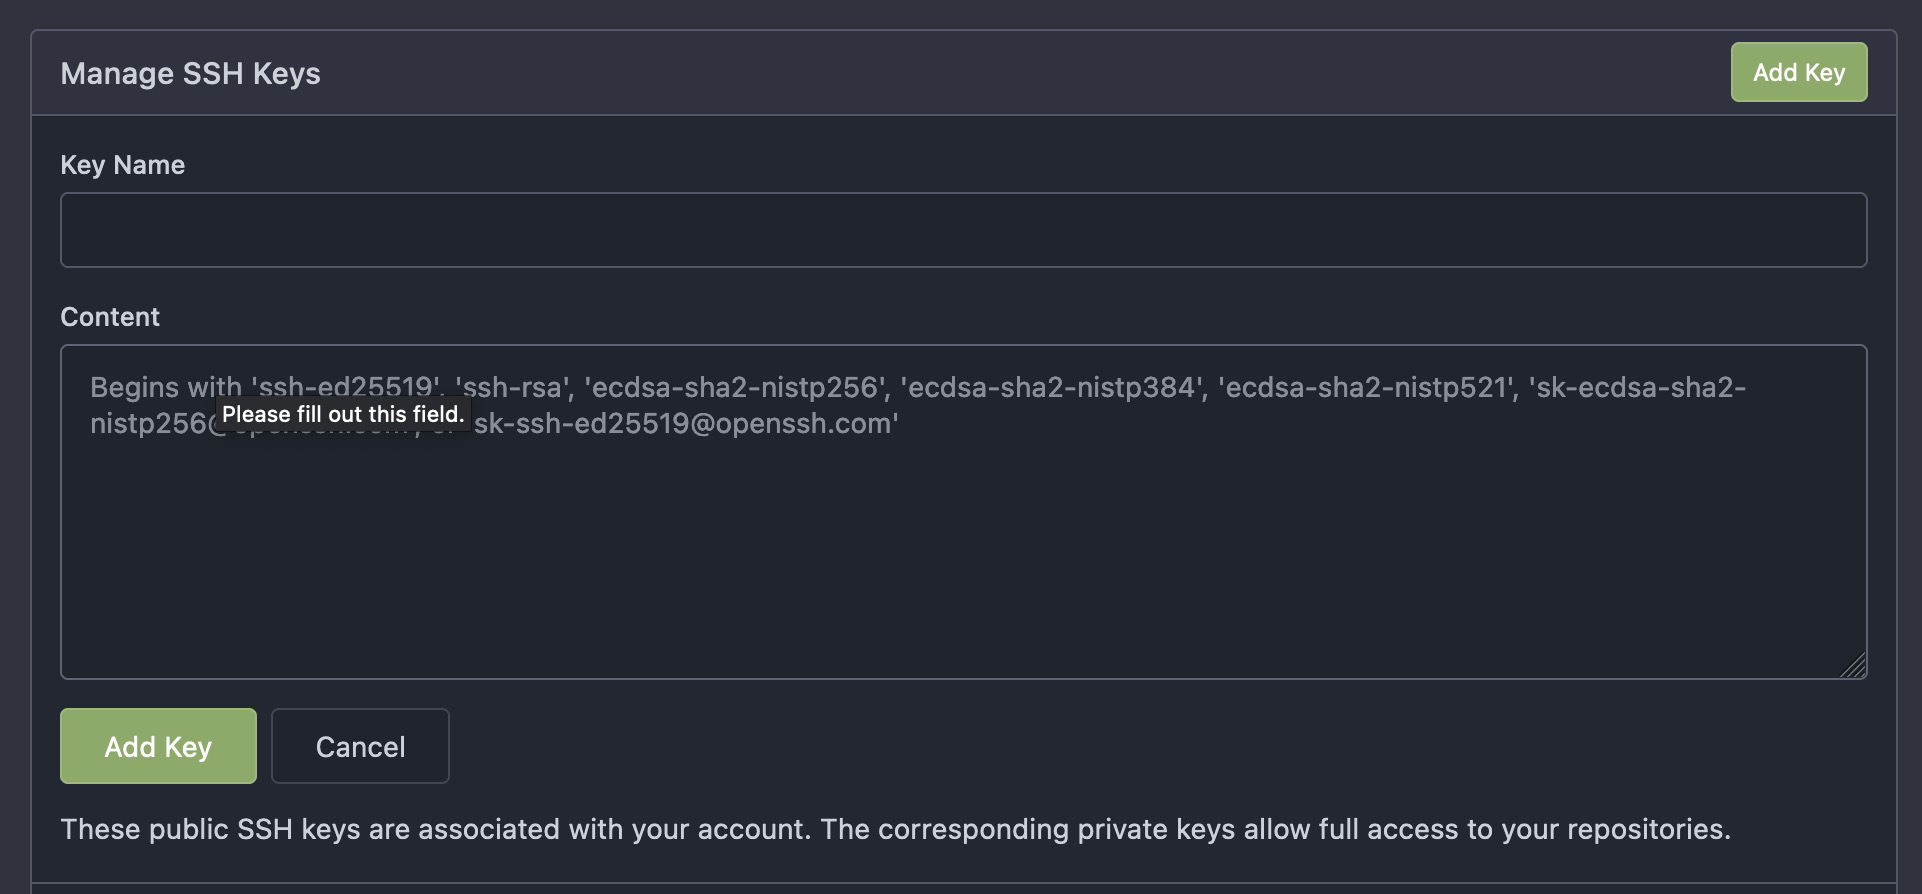
It should auto-complete the Key Name. Click Add Key to complete.
Your machine can now trusted to access the Git Repository via SSH. You can now pull and push to the repo.
Cloning a project / Pulling a Project
To Clone a project from the repo, go to the project on gitea.
Switch to SSH and click the Copy button to copy the SSH access URL.

Type git clone "URL" "DirectoryName"
git clone <PASTE URL HERE> <BRANCH NAME HERE>The branch name is not required. It is simply the name of the directory you are going to use for the files. I like to stay organized and make it the name of the branch.
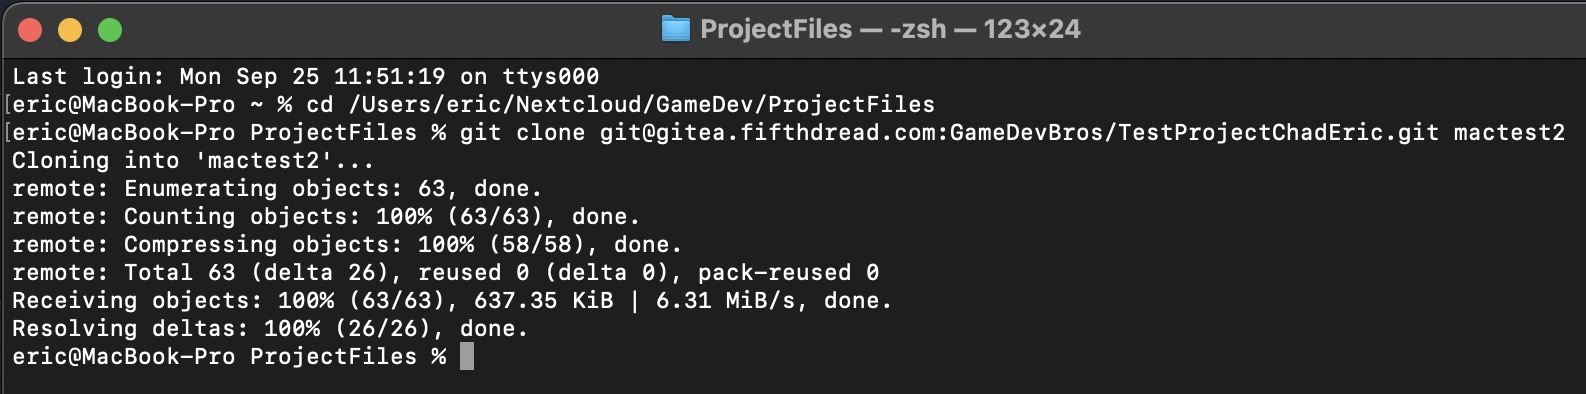
it will now download the repo.
Renaming your local git branch
This is important, as if you do not rename your branch prior to pushing it to the repo, it will override the main branch. Not good!
Check what branch you are on, and what the branch name is:
git branch
Rename Main branch to something else via the below command:
git branch -m <NAME>
Branches
To upload changes to a project, make sure you are working on a separate branch- RENAME YOUR BRANCH
Never upload directly to the main branch on a collaborative project, as branch merges need to be reviewed by the team prior to being merged.
Committing Changes
First verify you have renamed the Branch
git branchIf it is something other than main, we can proceed.

To see the changes you made since the repo was pulled, type:
git diff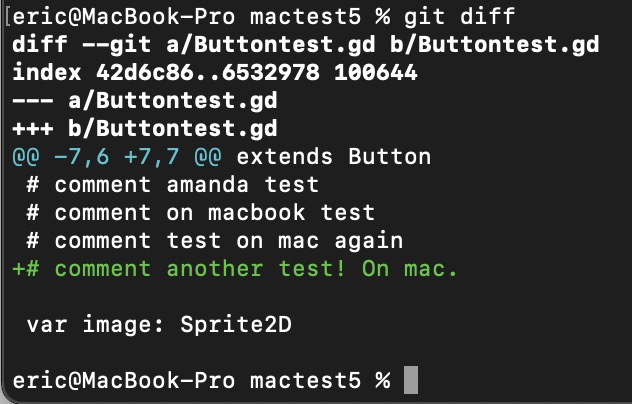
Commit the changes with the following command:
git commit -a
The NANO editor will appear if on MacOS, or your preferred editor on Windows, such as Notepad++. Edit the top of the document with your commit comments. Save when complete.
If you opened in VIM and not nano, it looks like this... ew. Don't ask me how VIM works.
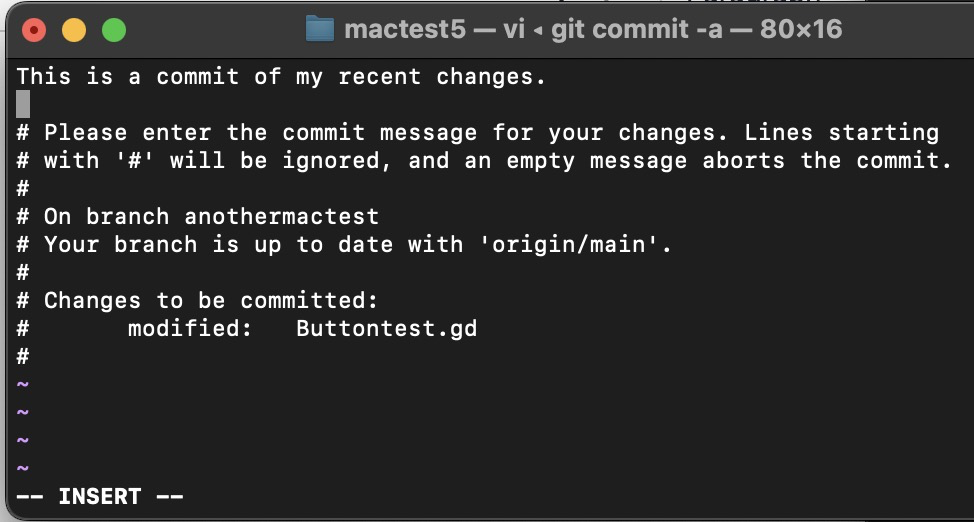
This is what it should look like if NANO opens the file.
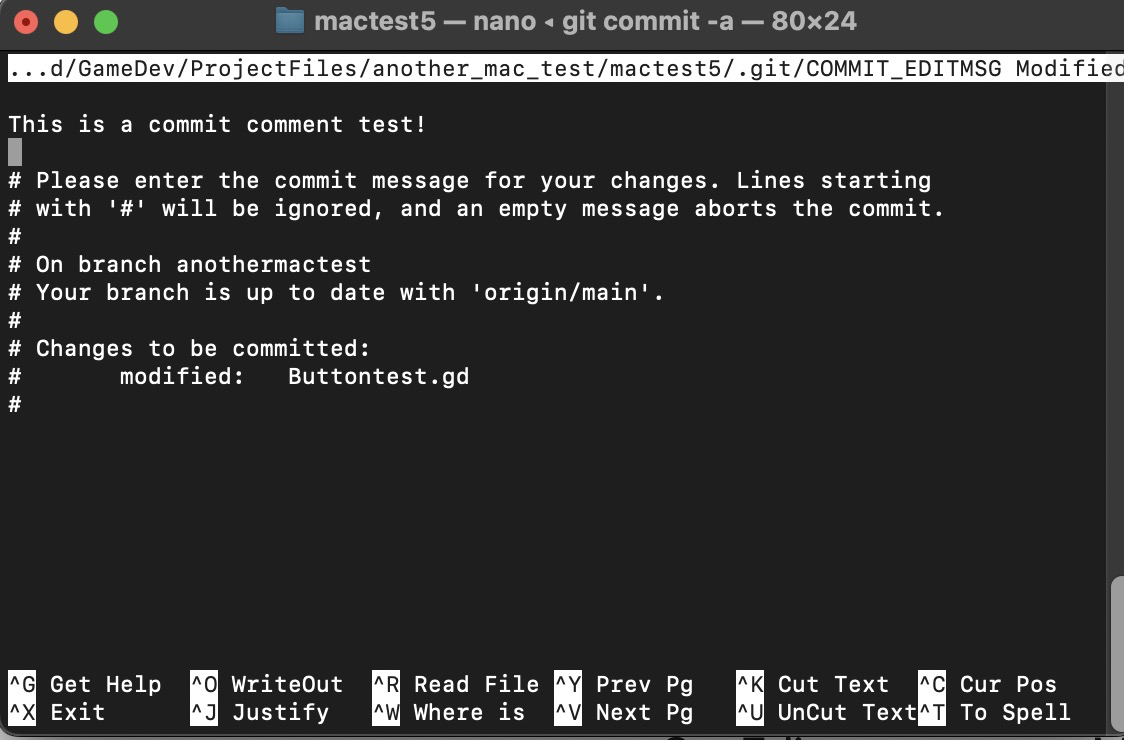
CTRL+X to exit, and yes to save

This indicates success.
To check the status of your branch.
git status
Uploading your new Branch / Pushing Changes
Again, make sure you aren't on main branch.
git branchNow type in the following to upload your changes!
git push origin HEADThis will upload a branch based off the name defined in "git branch"

Alternatively, define a branch name in the command.
git push origin HEAD:branchtestname Done!
Done!
Looking at different branches on Gitea
Go to Branches. Click on New Branch from Main.
In this example, I made a test branch called another_mac_test
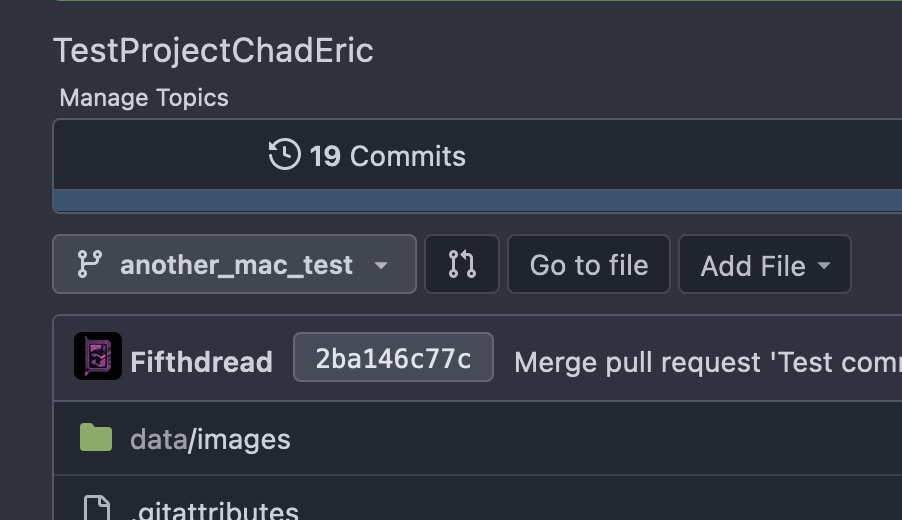
See how it is selected here- it shows "another_mac_test" indicating we are viewing the new branch.